
Anúncios
Modern vehicles are complex machines equipped with sophisticated electronic systems that monitor every aspect of performance, making automotive scanners essential tools for drivers and mechanics alike.


Understanding what’s happening under your hood has never been more accessible.
Anúncios
With the right automotive scanner, you can diagnose issues before they become expensive repairs, clear error codes, and gain insights into your vehicle’s health without visiting a mechanic for every warning light.

This comprehensive guide will walk you through everything you need to know about automotive scanners, from choosing the right device to interpreting diagnostic trouble codes and performing real-world troubleshooting on your vehicle.
Anúncios
🔍 What Exactly Is an Automotive Scanner?
An automotive scanner is a diagnostic device that connects to your vehicle’s onboard computer system through the OBD-II (On-Board Diagnostics) port. This standardized port has been mandatory in all cars sold in the United States since 1996 and in Europe since 2001.
The scanner reads data from various sensors throughout your vehicle, including the engine, transmission, ABS system, airbags, and emission controls. When something goes wrong, the vehicle’s computer stores a Diagnostic Trouble Code (DTC) that the scanner can retrieve and translate into understandable information.
Modern scanners range from basic code readers that simply display error codes to advanced professional-grade tools that provide live data streaming, component testing, and bi-directional controls. Some connect via Bluetooth or Wi-Fi to smartphone apps, while others feature built-in screens and buttons.
Understanding OBD-II Protocol Standards
Not all vehicles communicate the same way. The OBD-II system uses five different communication protocols:
- SAE J1850 PWM – Used primarily in Ford vehicles
- SAE J1850 VPW – Common in General Motors vehicles
- ISO 9141-2 – Found in many Asian and European cars
- ISO 14230 KWP2000 – European and Asian manufacturers
- ISO 15765 CAN – Mandatory in all vehicles from 2008 onward
Quality scanners automatically detect which protocol your vehicle uses, ensuring compatibility across different makes and models. This matters when choosing a scanner – cheaper devices may only support one or two protocols, limiting their usefulness.
🛠️ Types of Automotive Scanners Available
Choosing the right scanner depends on your skill level, budget, and diagnostic needs. Here’s a breakdown of the main categories:
Basic Code Readers
These entry-level devices read and clear engine codes (P-codes). They typically cost between $20-$50 and are perfect for DIY car owners who want to check why the check engine light is on before visiting a mechanic. However, they offer limited functionality and usually can’t access ABS, airbag, or transmission systems.
Mid-Range DIY Scanners
Priced between $50-$200, these scanners provide more detailed information including freeze frame data (conditions when the code was set), live data streaming, and access to multiple vehicle systems. Many feature color screens and user-friendly interfaces designed for home mechanics.
Bluetooth/Wi-Fi OBD-II Adapters
These compact devices plug into your OBD-II port and wirelessly connect to smartphone apps. Ranging from $15-$100, they offer impressive functionality for the price, including real-time performance monitoring, trip tracking, and comprehensive diagnostics through apps like OBD2 Car Scanner – EOBD Facile.
Professional-Grade Scan Tools
Used by mechanics and technicians, these devices ($200-$5,000+) offer advanced features like bi-directional controls, component activation, programming capabilities, and access to manufacturer-specific codes beyond standard OBD-II protocols.
📍 Locating Your Vehicle’s OBD-II Port
Before you can use any scanner, you need to find the OBD-II port. Manufacturers place it in different locations, but there are common spots to check:
- Under the dashboard on the driver’s side (most common location)
- Near the steering column or center console
- Inside the glove compartment
- Under the driver’s seat
- Behind removable panels in the footwell
The port is a trapezoid-shaped 16-pin connector, usually black or gray. It should be within 2 feet of the steering wheel and accessible without tools. If you can’t locate it, check your owner’s manual or search online using your vehicle’s year, make, and model.
💡 How to Use an Automotive Scanner Step-by-Step
Using a scanner is straightforward, but following proper procedure ensures accurate results and prevents issues.
Initial Setup and Connection
Step 1: Turn off your vehicle completely. Insert the scanner or Bluetooth adapter firmly into the OBD-II port until you feel it click into place. Most ports have a retention clip to prevent accidental disconnection.
Step 2: Turn your ignition to the “ON” position without starting the engine (accessories on, engine off). Some scanners power on automatically; others have a power button. For Bluetooth adapters, launch your diagnostic app and wait for the connection to establish.
Step 3: Wait for the scanner to initialize and communicate with your vehicle’s computer. This typically takes 5-30 seconds. The device will often display your vehicle’s VIN (Vehicle Identification Number), confirming successful connection.
Reading Diagnostic Trouble Codes
Navigate to the “Read Codes” or “Scan” function. The scanner will query all available vehicle systems (depending on the scanner’s capabilities) and display any stored codes. Codes follow a standardized format:
| Code Type | System | Example |
|---|---|---|
| P-codes | Powertrain (engine, transmission) | P0420 – Catalyst efficiency below threshold |
| B-codes | Body (airbags, doors, seats) | B1342 – ECU malfunction |
| C-codes | Chassis (ABS, suspension) | C1201 – Engine control system malfunction |
| U-codes | Network (communication issues) | U0100 – Lost communication with ECM |
Each code consists of five characters. The first character indicates the system, the second digit specifies whether it’s a generic (0) or manufacturer-specific (1) code, and the remaining three characters identify the specific fault.
Interpreting Freeze Frame Data
Freeze frame data captures operating conditions at the exact moment a code was triggered. This includes engine RPM, vehicle speed, coolant temperature, fuel trim values, and more. This information helps determine what the vehicle was doing when the problem occurred.
For example, a misfire code (P0301) occurring at idle with low coolant temperature might suggest different causes than the same code appearing at highway speeds under full load.
🔧 Common Diagnostic Trouble Codes and What They Mean
While thousands of possible codes exist, certain DTCs appear more frequently than others. Understanding these common codes helps you quickly assess severity and plan your response.
P0420/P0430 – Catalyst System Efficiency Below Threshold
This code indicates your catalytic converter isn’t working efficiently. Before replacing the expensive converter ($400-$2,500), check for exhaust leaks, faulty oxygen sensors, or engine misfires that could trigger false readings. Oxygen sensor replacement ($150-$300) often resolves this code without needing converter replacement.
P0171/P0174 – System Too Lean
These codes mean your engine is running with too much air or not enough fuel. Common causes include vacuum leaks, dirty mass airflow sensors, weak fuel pumps, or clogged fuel injectors. Start by inspecting vacuum hoses and cleaning the MAF sensor with specialized cleaner ($8-$12).
P0300-P0308 – Cylinder Misfire Detected
P0300 indicates random misfires, while P0301-P0308 specify which cylinder is misfiring. Check spark plugs ($15-$50 per set), ignition coils ($50-$200 each), and fuel injectors. Pay attention to freeze frame data to determine if misfires occur at specific RPM ranges or temperatures.
P0128 – Coolant Thermostat Below Temperature
Your engine isn’t reaching proper operating temperature, usually due to a stuck-open thermostat ($15-$50 part). This affects fuel economy and heater performance. It’s a simple repair but shouldn’t be ignored, as prolonged low operating temperatures cause increased wear and emissions.
P0442/P0455/P0456 – EVAP System Leak
Evaporative emission system leaks prevent fuel vapors from being properly contained. Before expensive diagnostics, check that your gas cap is tight and the seal isn’t cracked. A new gas cap ($15-$30) solves this issue 30% of the time. Larger leaks require smoke testing to locate.
📊 Using Live Data to Diagnose Issues
Beyond reading codes, advanced scanners stream real-time data from dozens of sensors. This capability transforms your scanner from a simple code reader into a powerful diagnostic tool.
Key Parameters to Monitor
Fuel Trim Values: Short-term fuel trim (STFT) and long-term fuel trim (LTFT) show how the computer adjusts the air-fuel mixture. Values between -10% and +10% are normal. Numbers outside this range indicate the system is compensating for a problem.
Oxygen Sensor Readings: Upstream O2 sensors should fluctuate between 0.1V and 0.9V several times per second at idle. Downstream sensors should remain relatively stable around 0.45V. Frozen readings or slow response times indicate sensor failure.
Engine Coolant Temperature: Should reach 185-220°F (85-104°C) within 5-10 minutes of driving. Lower temperatures suggest thermostat issues; higher readings indicate cooling system problems.
Throttle Position Sensor: Should read 0% at idle and increase smoothly to 100% at wide-open throttle. Erratic readings or gaps in the sweep indicate a failing TPS.
Performing a Road Test Diagnosis
Many intermittent problems only occur under specific driving conditions. Using live data during a road test can capture issues that don’t trigger codes during stationary scans. Monitor multiple parameters simultaneously while replicating the conditions when symptoms appear.
For example, a hesitation during acceleration might show up as a sudden drop in fuel pressure, a sticking throttle position sensor, or irregular mass airflow readings that wouldn’t be visible during a parking lot scan.
✅ Clearing Codes: When and When Not To
Your scanner’s “Clear Codes” function erases stored DTCs and resets the check engine light. However, clearing codes indiscriminately can complicate diagnosis and waste your time.
Clear codes after: Completing a repair to verify the fix worked. The light should stay off if the problem is resolved. Drive through several drive cycles (combinations of city and highway driving with cold starts) to ensure codes don’t return.
Don’t clear codes when: You haven’t addressed the underlying problem. The codes will return immediately or after a few drive cycles. Some states require your vehicle to complete readiness monitors before passing emissions testing – clearing codes resets these monitors, requiring a week or more of driving to set them again.
If a code returns after clearing, the problem still exists. Some issues are intermittent, appearing only under specific conditions, which is why freeze frame data proves so valuable.
🚗 Vehicle-Specific Scanning Features
While OBD-II provides standardized codes, manufacturers implement additional proprietary systems requiring enhanced scanners or manufacturer-specific tools.
Enhanced Diagnostics for Different Brands
European vehicles (BMW, Mercedes-Benz, Audi, Volkswagen) often require enhanced protocols to access all modules. Basic scanners might miss codes in transmission, ABS, or comfort control modules.
Japanese manufacturers (Toyota, Honda, Nissan) generally follow OBD-II standards closely but use specific codes for hybrid systems and advanced safety features that generic scanners can’t access.
Domestic brands (Ford, GM, Chrysler) offer varying levels of enhanced data. Ford’s extensive Mode 6 data provides detailed sensor test results beyond basic OBD-II parameters.
Bi-Directional Controls and Active Testing
Professional scanners can command vehicle systems to perform specific actions – cycling the EVAP purge valve, activating fuel injectors individually, or running the radiator fan. This active testing isolates components to verify they function correctly when commanded.
Home mechanics rarely need bi-directional controls, but they’re invaluable for diagnosing intermittent electrical issues or verifying repairs before reassembly.
🛡️ Preventive Monitoring and Maintenance
Smart scanner use goes beyond troubleshooting check engine lights. Regular monitoring catches developing problems before they cause breakdowns.
Establishing Baseline Values
When your vehicle runs properly, record baseline values for key parameters: fuel trim at idle and cruise, coolant temperature at operating temp, oxygen sensor switching rates, and transmission fluid temperature. These baselines help identify changes before they trigger codes.
Monthly Health Checks
Perform quick 5-minute scans monthly, even without warning lights. Check for pending codes (problems detected but not yet severe enough to illuminate the check engine light) and monitor readiness status. This proactive approach prevents surprise failures during emissions testing or road trips.
Pre-Purchase Inspections
Never buy a used vehicle without scanning it first. Sellers might clear codes before showing the car, but readiness monitors reveal recent code clearing. Multiple “not ready” systems indicate someone recently cleared codes, suggesting hidden problems.
Pending codes and historical DTCs tell the vehicle’s repair history. A car with multiple cleared catalytic converter codes likely needs an expensive repair, regardless of what the current scan shows.
📱 Smartphone App Integration and Cloud Features
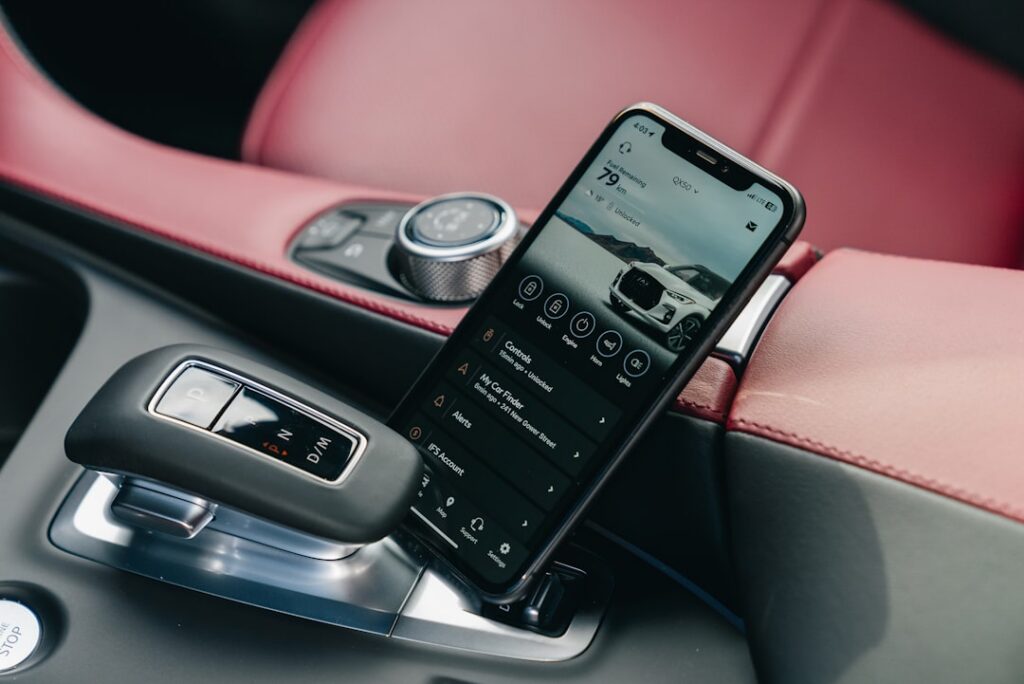
Modern Bluetooth OBD-II adapters paired with powerful smartphone apps rival dedicated handheld scanners at a fraction of the cost. Apps like OBD2 Car Scanner – EOBD Facile transform your phone into a comprehensive diagnostic tool.
Advantages of App-Based Scanning
Regular updates add new features and expand vehicle compatibility without buying new hardware. Cloud-based code libraries provide detailed explanations and common fixes for thousands of DTCs. Some apps include repair cost estimates, nearby mechanic recommendations, and community forums where users share solutions.
Data logging features record entire drive sessions, capturing intermittent problems that occur randomly. You can review logged data later or share it with mechanics to expedite diagnosis.
Performance Monitoring Features
Beyond diagnostics, apps provide real-time performance metrics: 0-60 mph times, quarter-mile performance, horsepower estimates, and fuel economy tracking. Customizable dashboards display multiple parameters simultaneously, perfect for track days or performance tuning.
🎯 Choosing the Right Scanner for Your Needs
Match your scanner purchase to your actual requirements rather than buying more tool than necessary.
For occasional DIY use: A Bluetooth adapter ($25-$50) with a quality app covers 90% of home mechanic needs. You’ll read and clear codes, view live data, and perform basic diagnostics on all your vehicles.
For serious home mechanics: Mid-range dedicated scanners ($100-$250) with built-in screens offer faster operation and don’t drain your phone battery. Look for models supporting multiple vehicle systems (ABS, SRS, transmission) beyond basic engine codes.
For professional use: Invest in manufacturer-specific tools or high-end multi-brand scanners ($500+) with bi-directional controls, advanced coding capabilities, and regular software updates. These pay for themselves quickly in a professional setting.
For fleet management: Cloud-connected devices that automatically log trips, monitor driver behavior, and alert you to developing problems across multiple vehicles simultaneously.
⚠️ Safety Precautions When Scanning
While automotive scanners are safe tools, following basic precautions prevents problems.
Never leave the scanner connected while driving unless specifically performing a road test diagnosis. Loose scanners can interfere with pedal operation. Always secure Bluetooth adapters that remain plugged in.
Disconnecting the scanner or clearing codes while the engine runs can cause electrical issues in some vehicles. Always turn off the ignition before unplugging the device.
Some advanced functions (bi-directional controls, reprogramming) can cause serious problems if used incorrectly. Don’t experiment with these features unless you understand their purpose and consequences.
Remember that scanners identify problems but don’t repair them. Some repairs require professional expertise, specialized tools, or safety precautions beyond DIY capabilities. Know your limits.
🔮 The Future of Automotive Diagnostics
Vehicle technology evolves rapidly, and diagnostic tools advance alongside it. Electric vehicles introduce entirely new diagnostic parameters focusing on battery health, charging system performance, and electric motor efficiency rather than traditional combustion metrics.
Advanced driver assistance systems (ADAS) require specialized calibration after windshield replacement or alignment work. Future scanners will integrate camera-based calibration tools and expanded functionality for autonomous vehicle systems.
Cloud connectivity enables predictive maintenance, analyzing driving patterns and sensor data to forecast component failures before they occur. Imagine receiving alerts that your alternator shows early signs of failure, allowing planned replacement rather than roadside emergency.
Augmented reality integration will overlay diagnostic information onto your view of the engine bay through your smartphone camera, highlighting components related to specific codes and guiding repair procedures step-by-step.
Despite advancing complexity, the fundamental purpose remains unchanged: giving vehicle owners and mechanics insight into what’s happening inside increasingly sophisticated machines. An automotive scanner transforms cryptic warning lights into actionable information, empowering you to maintain your vehicle properly and avoid unnecessary repair costs.
Whether you’re a DIY enthusiast tackling weekend projects, a concerned owner wanting to verify mechanic recommendations, or a professional technician diagnosing complex problems, the right automotive scanner gives you the knowledge to make informed decisions about your vehicle’s health and maintenance needs.

Toni Santos is a visionary artisan and conceptual designer who channels the beauty of living organisms into structural expression. At Zureste, Toni explores the intricate elegance of insect anatomy, organic flow, and bioinspired design to create art that feels both natural and otherworldly.
Each creation Toni brings to life reflects a harmonic tension between structure and softness, wildness and control — echoing the complex intelligence found in the natural world. From beetle-like silhouettes to root-shaped contours, his work blurs the lines between biology, sculpture, and modern art.
Guided by fascination for metamorphosis, evolution, and pattern in nature, Toni’s pieces embody transformation. His BioLight Collection and conceptual series like Insect Type and Structure Aesthetics offer viewers more than aesthetic value — they present immersive experiences of living design.
As the creative force behind Zureste, Toni invites us to rethink beauty, architecture, and identity through a new lens — one shaped by wings, bones, spirals, and the microscopic poetry of the organic.
His creations reflect:
-
Design deeply rooted in the geometry of life
-
Inspiration from insects, roots, and the unseen natural order
-
A blend of science, spirituality, and visual storytelling
Whether you’re a lover of strange beauty, an admirer of evolution’s artistry, or a creative mind seeking something different, Toni welcomes you into a world where living forms become meaning, and surreal becomes sublime.